How to connect your Shopify Store with botbaba?
Here is the basic overview of the integration:
- botbaba should know the address (URL) of your store.
- botbaba should be able to access data from your store
- Shopify should know that your store needs to push events’ data to botbaba
Here are the steps you need to perform in order to connect your Shopify store with botbaba.
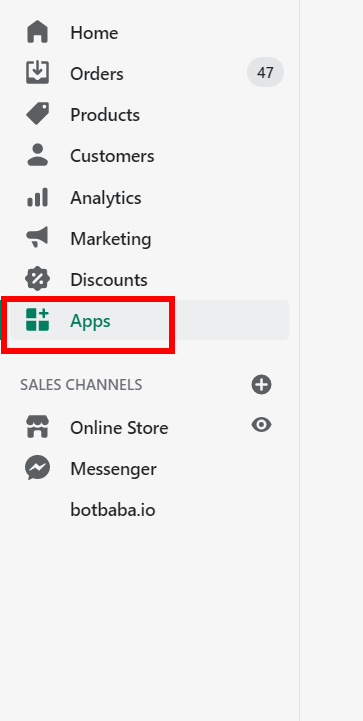
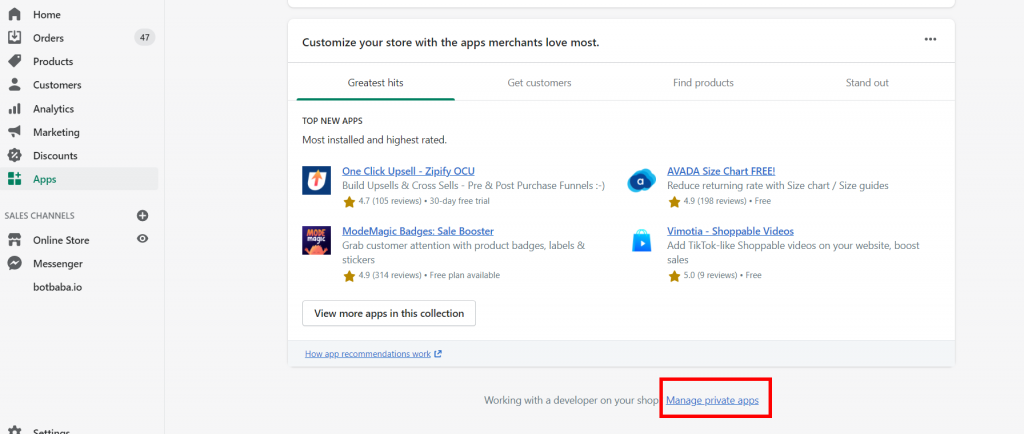
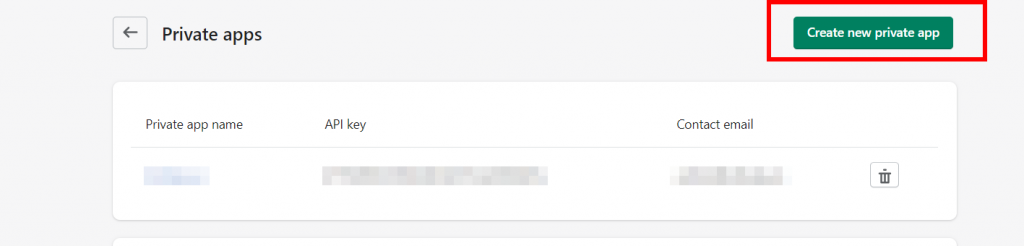
Step 1: Let’s Create a Private App on your Shopify Store

- Private app name – botbaba (any name will do, its only for your identification)
- Emergency developer email – [email protected]
- Assigned fulfillment orders – Read Access
- Customers – Read Access
- Fulfillment services – Read Access
- Orders – Read Access
- Third-party fulfillment orders – Read Access
- Webhook API version – 2020-10
Save the app.
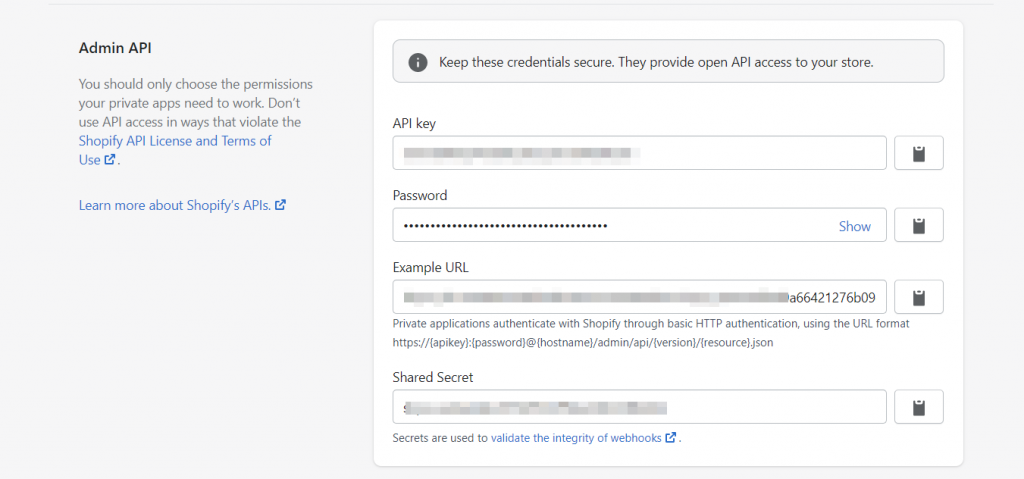
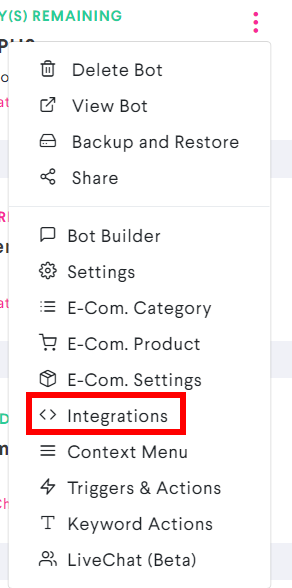
Step 2: Add the credentials of the Private App in the Integration section of your bot on botbaba.
Login to botbaba and go to the Integrations section of the bot you want to use with Shopify.
Tick the Private App checkbox to see those text boxes.
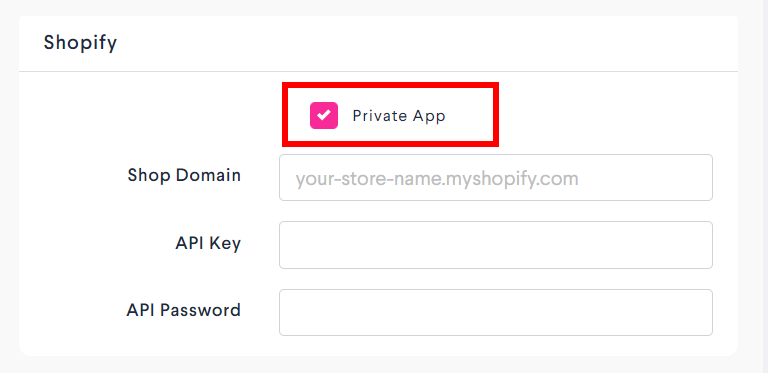
- Shop Domain: Example – xyz.myshopify.com (without https:// and without www)
- API Key: Same API Key from step 2.1
- API Password: Password from step 2.1
Save & Close
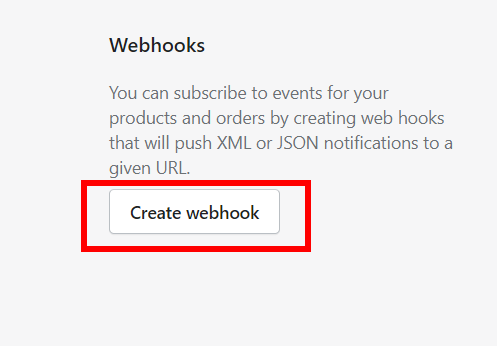
Step 3: Create botbaba Webhooks in your Shopify store so that we receive the events from your store

Repeat Step 3.2 and 3.3 to add 6 more webhooks.
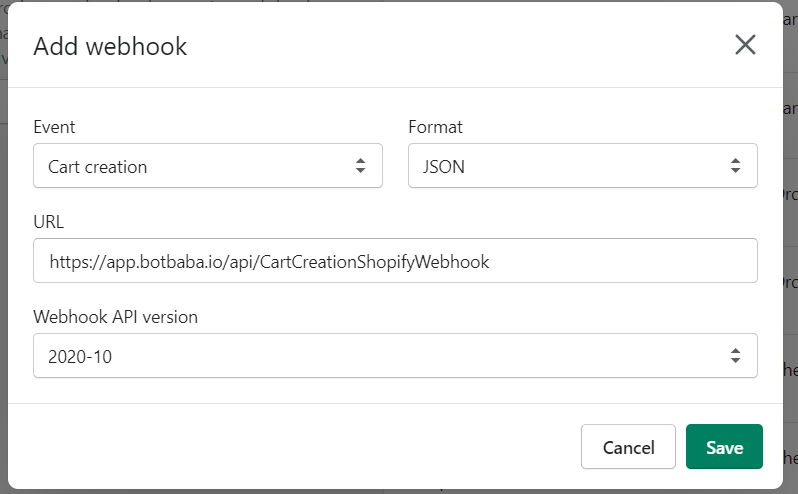
Here is the list of all the Events and Webhook URLs for those events.
- Cart Creation – https://app.botbaba.io/api/CartCreationShopifyWebhook
- Cart Update – https://app.botbaba.io/api/CartUpdateShopifyWebhook
- Checkout Creation – https://app.botbaba.io/api/CheckoutCreationShopifyWebhook
- Checkout Update – https://app.botbaba.io/api/CheckoutUpdateShopifyWebhook
- Order Cancellation – https://app.botbaba.io/api/OrderCancellationShopifyWebhook
- Order Fulfillment – https://app.botbaba.io/api/OrderFulfillmentShopifyWebhook
- Order Payment – https://app.botbaba.io/api/OrderPaymentShopifyWebhook
Keep the Webhook API Version as 2020-10 and Format as JSON
Once you are done adding these,
You can go ahead and use the Shopify Triggers in the Triggers and Actions section and start shooting WhatsApp, Telegram, Email and HTTP Requests (API Calls) to your customers.
Here is how Triggers and Actions work.
Here is how Shopify Triggers and Actions work.