How to Create a multi-store eCom Bot?
You can do it 2 ways –
- Using buttons
- Using Auto Suggestion + Conditional Jump
Step 1: Create a new block
You can start with creating a new block or by editing a block that is already present in the flow.
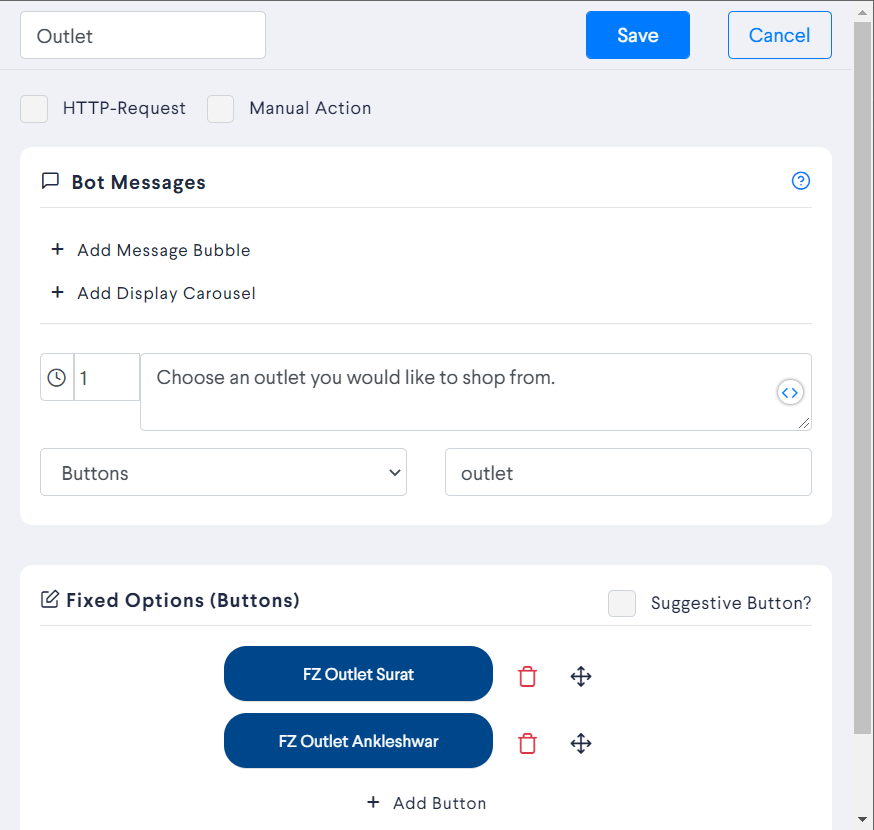
Step 2: Enter the question.
Step 3: Select input type as Buttons
After selecting Input Type as Buttons add buttons for each Outlet.
In the below example we have 2 outlets FZ Surat & FZ Ankleshwar.
After adding the buttons click on Save.
Step 4: Connect the button
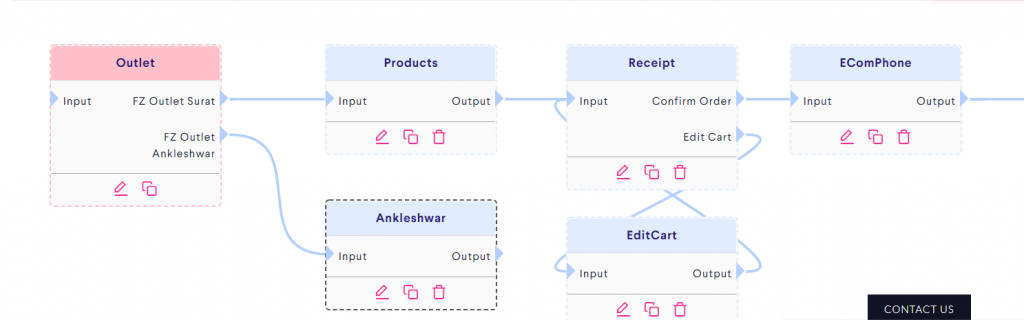
We are working on Surat Outlet Bot. Therefore we will connect the FZ Outlet Surat Button to the flow.

Step 5: Create a New Block to connect the second outlet.
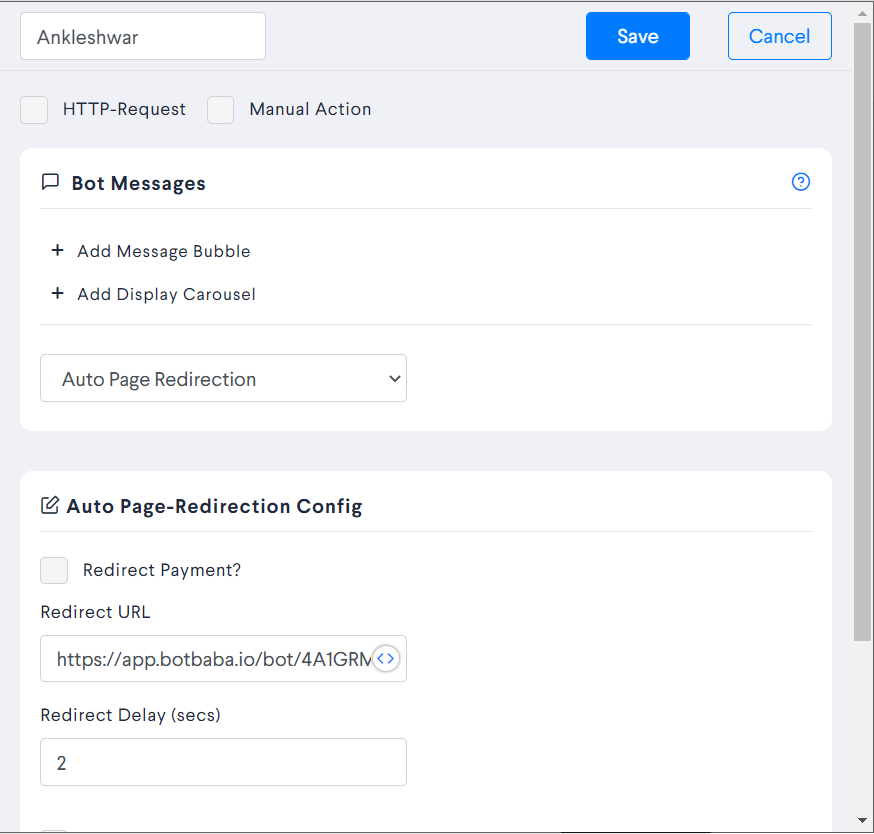
Created a New Block – Ankleshwar.
Step 6: Select Input Type as Auto Page Redirection.
Step 7: Add Redirect URL
Add your second bot link in Redirect Url.
Step 6: Save the block.
Step 7: Connect the Second Outlet Button to the block just created.
Connecting FZ Outlet Ankleshwar to Block Ankleshwar.
Step 8: Click On Publish
How to Create a multi-store eCom Bot using Auto Suggestion?
Step 1: Create a new block
You can start with creating a new block or by editing a block that is already present in the flow.
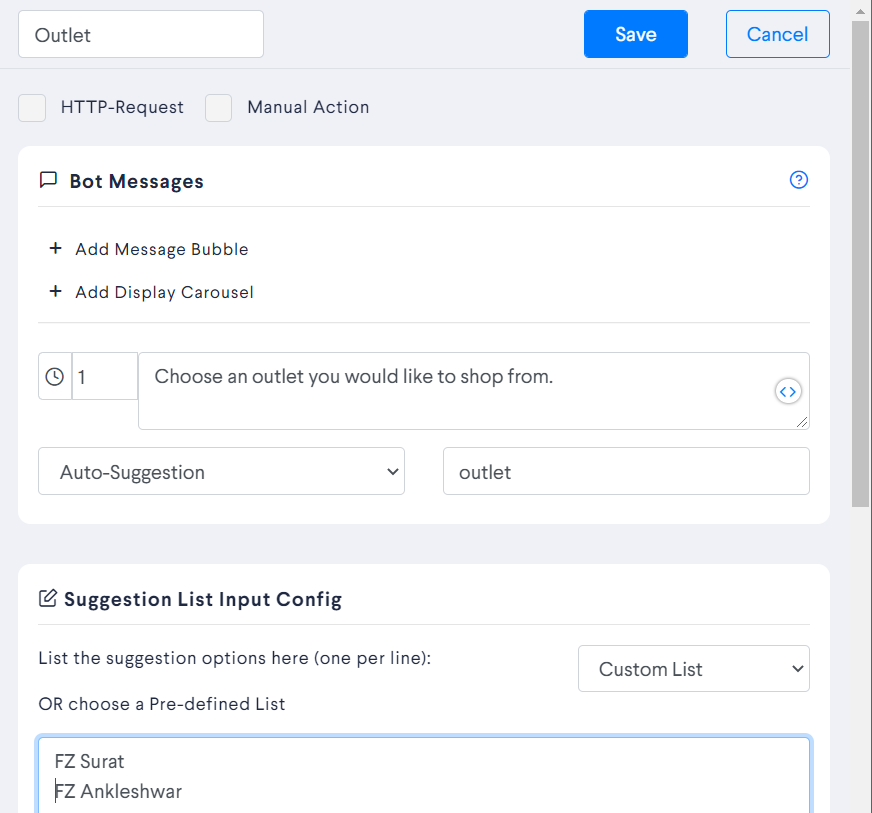
Step 2: Enter the question.
Step 3: Select the Input type as Auto-Suggestion.
After selecting Input Type as Auto Suggestion add suggestion options one per line.
In the below example we have 2 suggestions FZ Surat & FZ Ankleshwar.
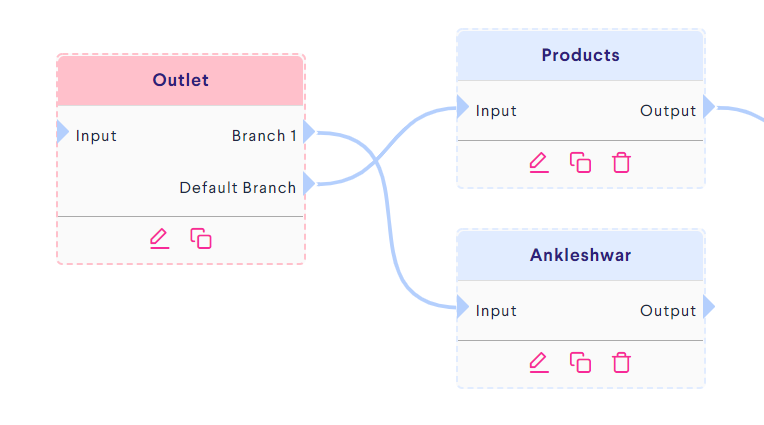
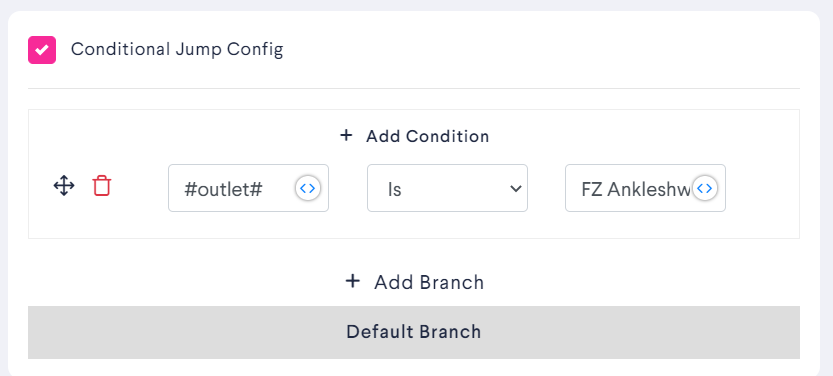
Step 3: Select Conditional Jump Config.
Select Conditional Jump Config and Add a Branch.
Add Condition
Field = #DynamicVariable#
Command = Is
Value = Outlet Name.
After Adding the Condition Click On Save.
Step 4: Create a New Block to connect Branch 1.
Step 5: Select Input Type as Auto Page Redirection.
Step 6: Add Redirect URL
Add your second bot link in Redirect Url.
Step 6: Save the block.
Step 7: Connections
Connect Default Branch to the Flow
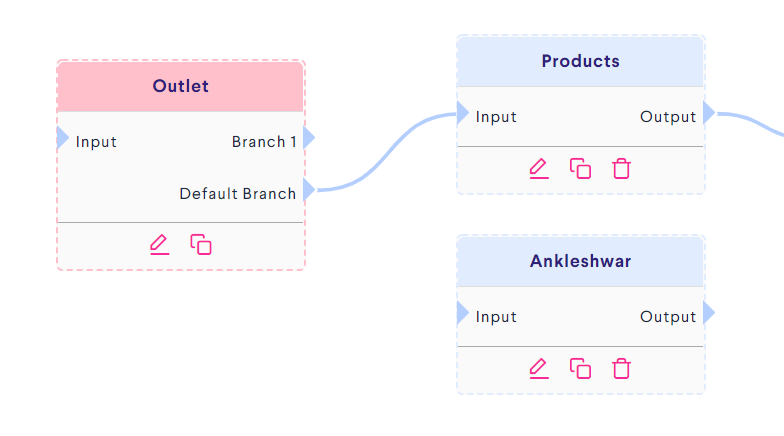
Connect Branch 1 to the block you created containing Redirect URL.
Connecting Branch 1 to Block Ankleshwar.