How to add Product Categories?
To add E-Com categories, follow the below-mentioned steps.
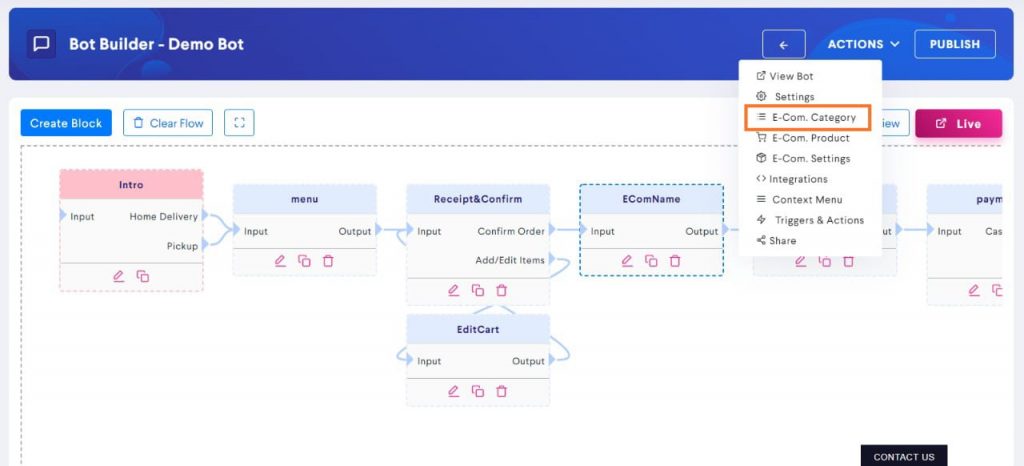
Step 1: Go to E-Com Categories
Click on Actions button and then go to E-Com Category.
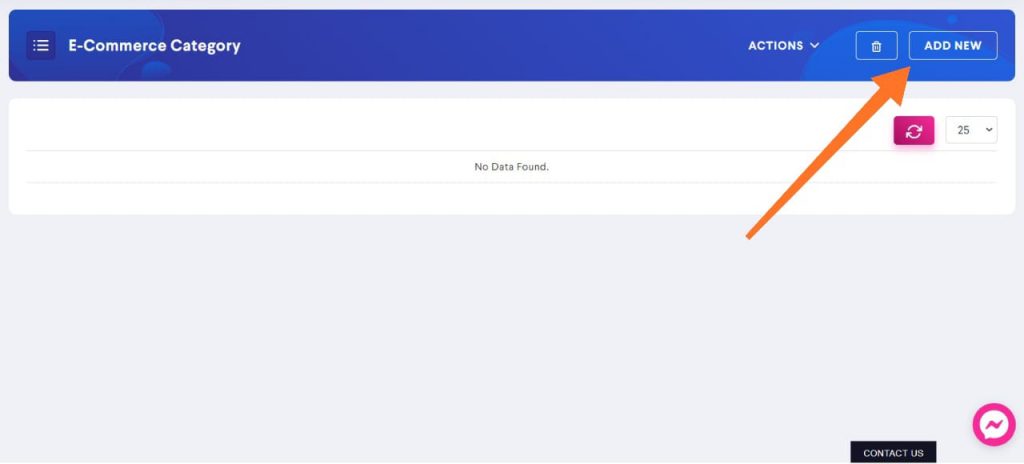
Step 2: Click on Add New
To add a product, click on Add New button on the top-right side of the dashboard.
Step 3: Fill in the details
You have fill the following details to add an E-Com Category:

- Category Name – Add the name of the category here. For example, if you own a clothing store, one of the categories could be Female Clothing.
- Description – Writing a description is optional. You can write a brief description for a category to help customers better understand it.
- Popular – If a particular category is popular among your customer base, then you can tick this box to let new customers know what others prefer. The categories marked as popular will be displayed at the top when you select Products Pro input type.
- Active – This option is used to let the user know whether products under a particular category are available or not. If the category is available, check on Active.
Step 4: Click on Save
Make sure you click on Save button before moving forward.

To add more categories, repeat the same process.